In this adorable Gingerbread House Card project I wanted to demonstrate that you can mix two different houses together to create a new house. And Reveal Wheel Cards are a fun interactive card that reveals a surprise in the window as you turn the dial, built into the card. This is a simple card to make but it has a lot of pieces to cut out.
To get started you'll need to cut your card stock.
Cut a piece of Raspberry Card Stock (4 1/4" X 11") for the card base and score it in half, at 5 1/2", for a top fold card.
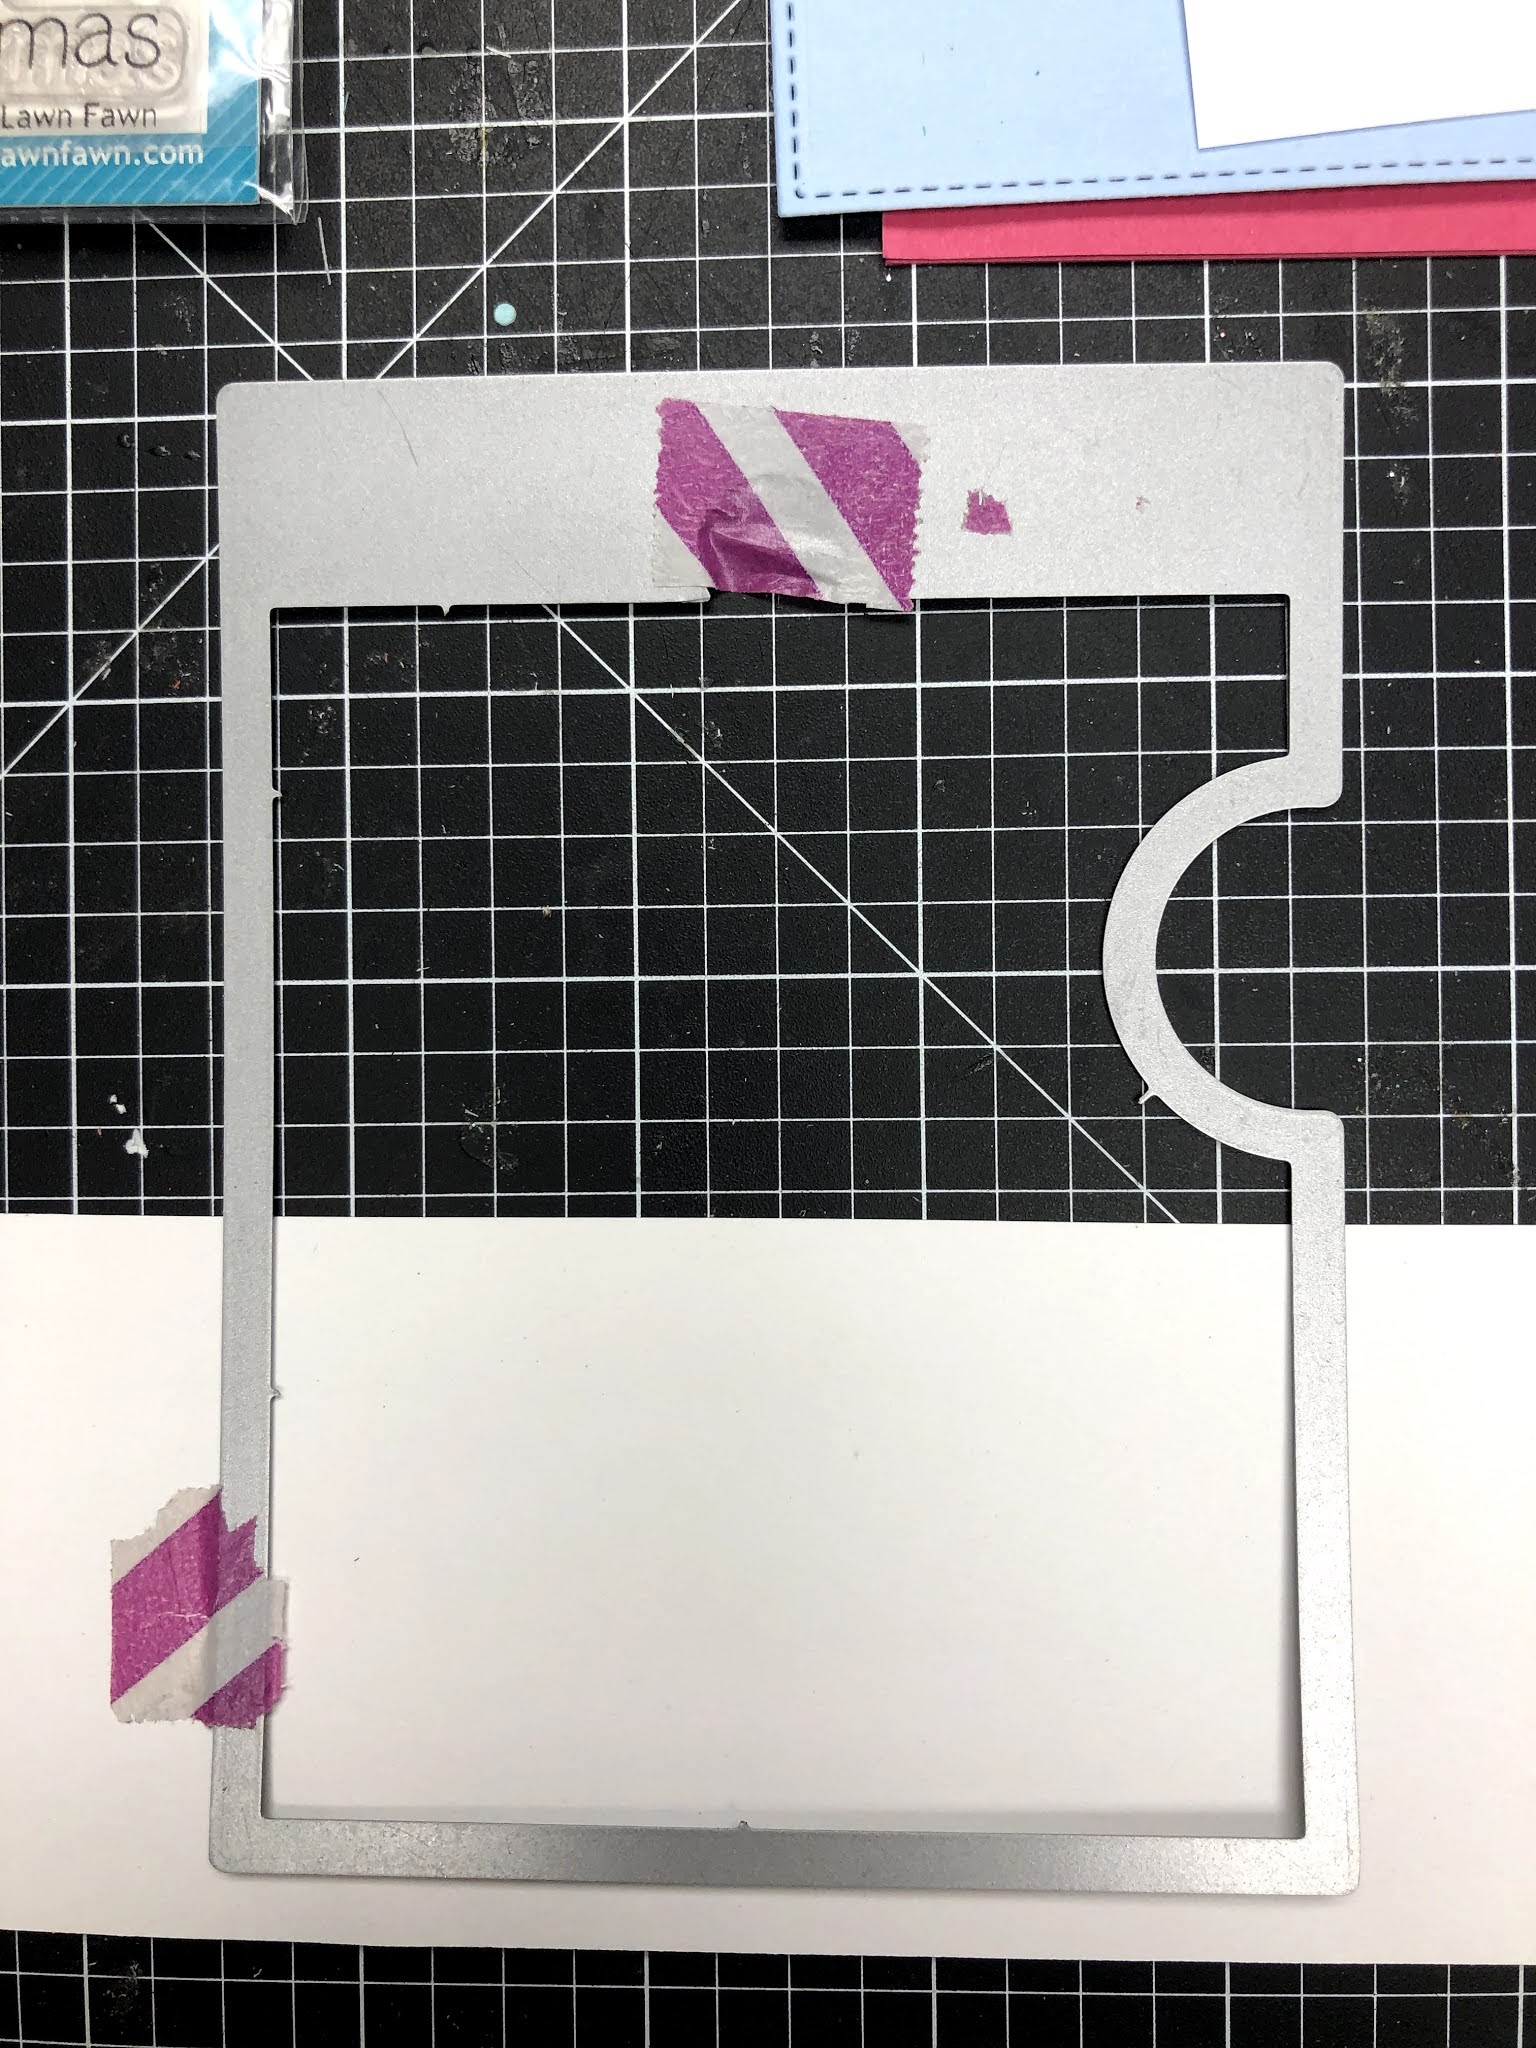
Cut two pieces of blue card stock 4 1/4" X 5 1/2" then cut two panels out with the Reveal Wheel die set. One of them will need the window cut out using the Reveal Wheel Build-A-House Add-On. Tape the window die into the Panel Die like a puzzle piece and cut out as usual.
Cut a wheel and small circle from the Reveal Wheel die set from yellow card stock.
Cut a piece of White Card Stock (4" X 5 1/4") to adhere inside the card for a place to write a message. This piece also adds weight to the back of the card to even the feel of the card when open.
For the snow drift: from white card stock cut a piece about 2 1/2" X 4 1/2" and run it through the die cutter with the Reveal Wheel panel along the bottom. This will cut the stitched lines in the white piece and help it to match up with the blue sky background piece.
Then use a hillside die to make the stitched hill on the top edge of the white piece. The hillside makes great snow banks. I removed my hillside die from the packaging years ago so I don't know what brand mine is. Go ahead and stamp your message on the bottom of the snow bank.
It's easiest to do your stamping now rather than once you have dimensional foam tape on the back. Make sure you're using ink that will play well with the medium you're using to color your images. I'm using alcohol markers so I'm stamping with Memento Tuxedo Black Dye Ink. Cut a straight set of lights and an angled set of lights from Build-A-House Christmas Add-On from the white card stock. I find it's easier to color white card stock than to try to paper-piece tiny Christmas lights.
With your scraps of white card stock, stamp some images that you'll want peeking through the window. I chose three but you could have four. I also stamped two opposing candy canes to decorate the front of my house. I wanted three gumdrops grouped together so I masked and stamped three together.
To group three gumdrops together you'll need to make a mask by stamping two gumdrops on a low tack reposition-able paper or tape. I used a post it note that is completely sticky on the back. Then fussy cut them out. Stamp one gumdrop on the white card stock. This will be the one in the foreground. Place one of your masks on top to cover it up.
Then stamp your second gum drop down and to the side of the first one and place the second mask on that gumdrop. If your third gumdrop won't intersect the second gumdrop it won't be necessary to mask that one. I wasn't sure when I started so I went ahead and masked the second gumdrop.
Stamp the third gum drop.
Then remove all of the masks to reveal the cluster. This is like magic. It is work to mask images but you get dimension by doing this. I think its totally worth it. You'll have to fussy cut these because the die won't cut this out. But you can use dies for all of the other images.
Color all of your images and die cut them. I used Spectrum Noir markers to color my images. You could stamp the images on a white Reveal Wheel and color the wheel but I wanted it to look like there was a light on in the house so I cut my reveal wheel out of yellow card stock.

For the house: cut the house from Build-A-House with brown or Craft Card Stock. Then stamp and cut out the Gingerbread House from Sweet Christmas. In hindsight it wouldn't have been necessary to stamp the house. I did stamp a red heart above the door. I thought it was a nice touch.
For the door and roofs we will be cutting out the angled roof, awning and rounded door from the Build-A-House die set, from pink card stock.
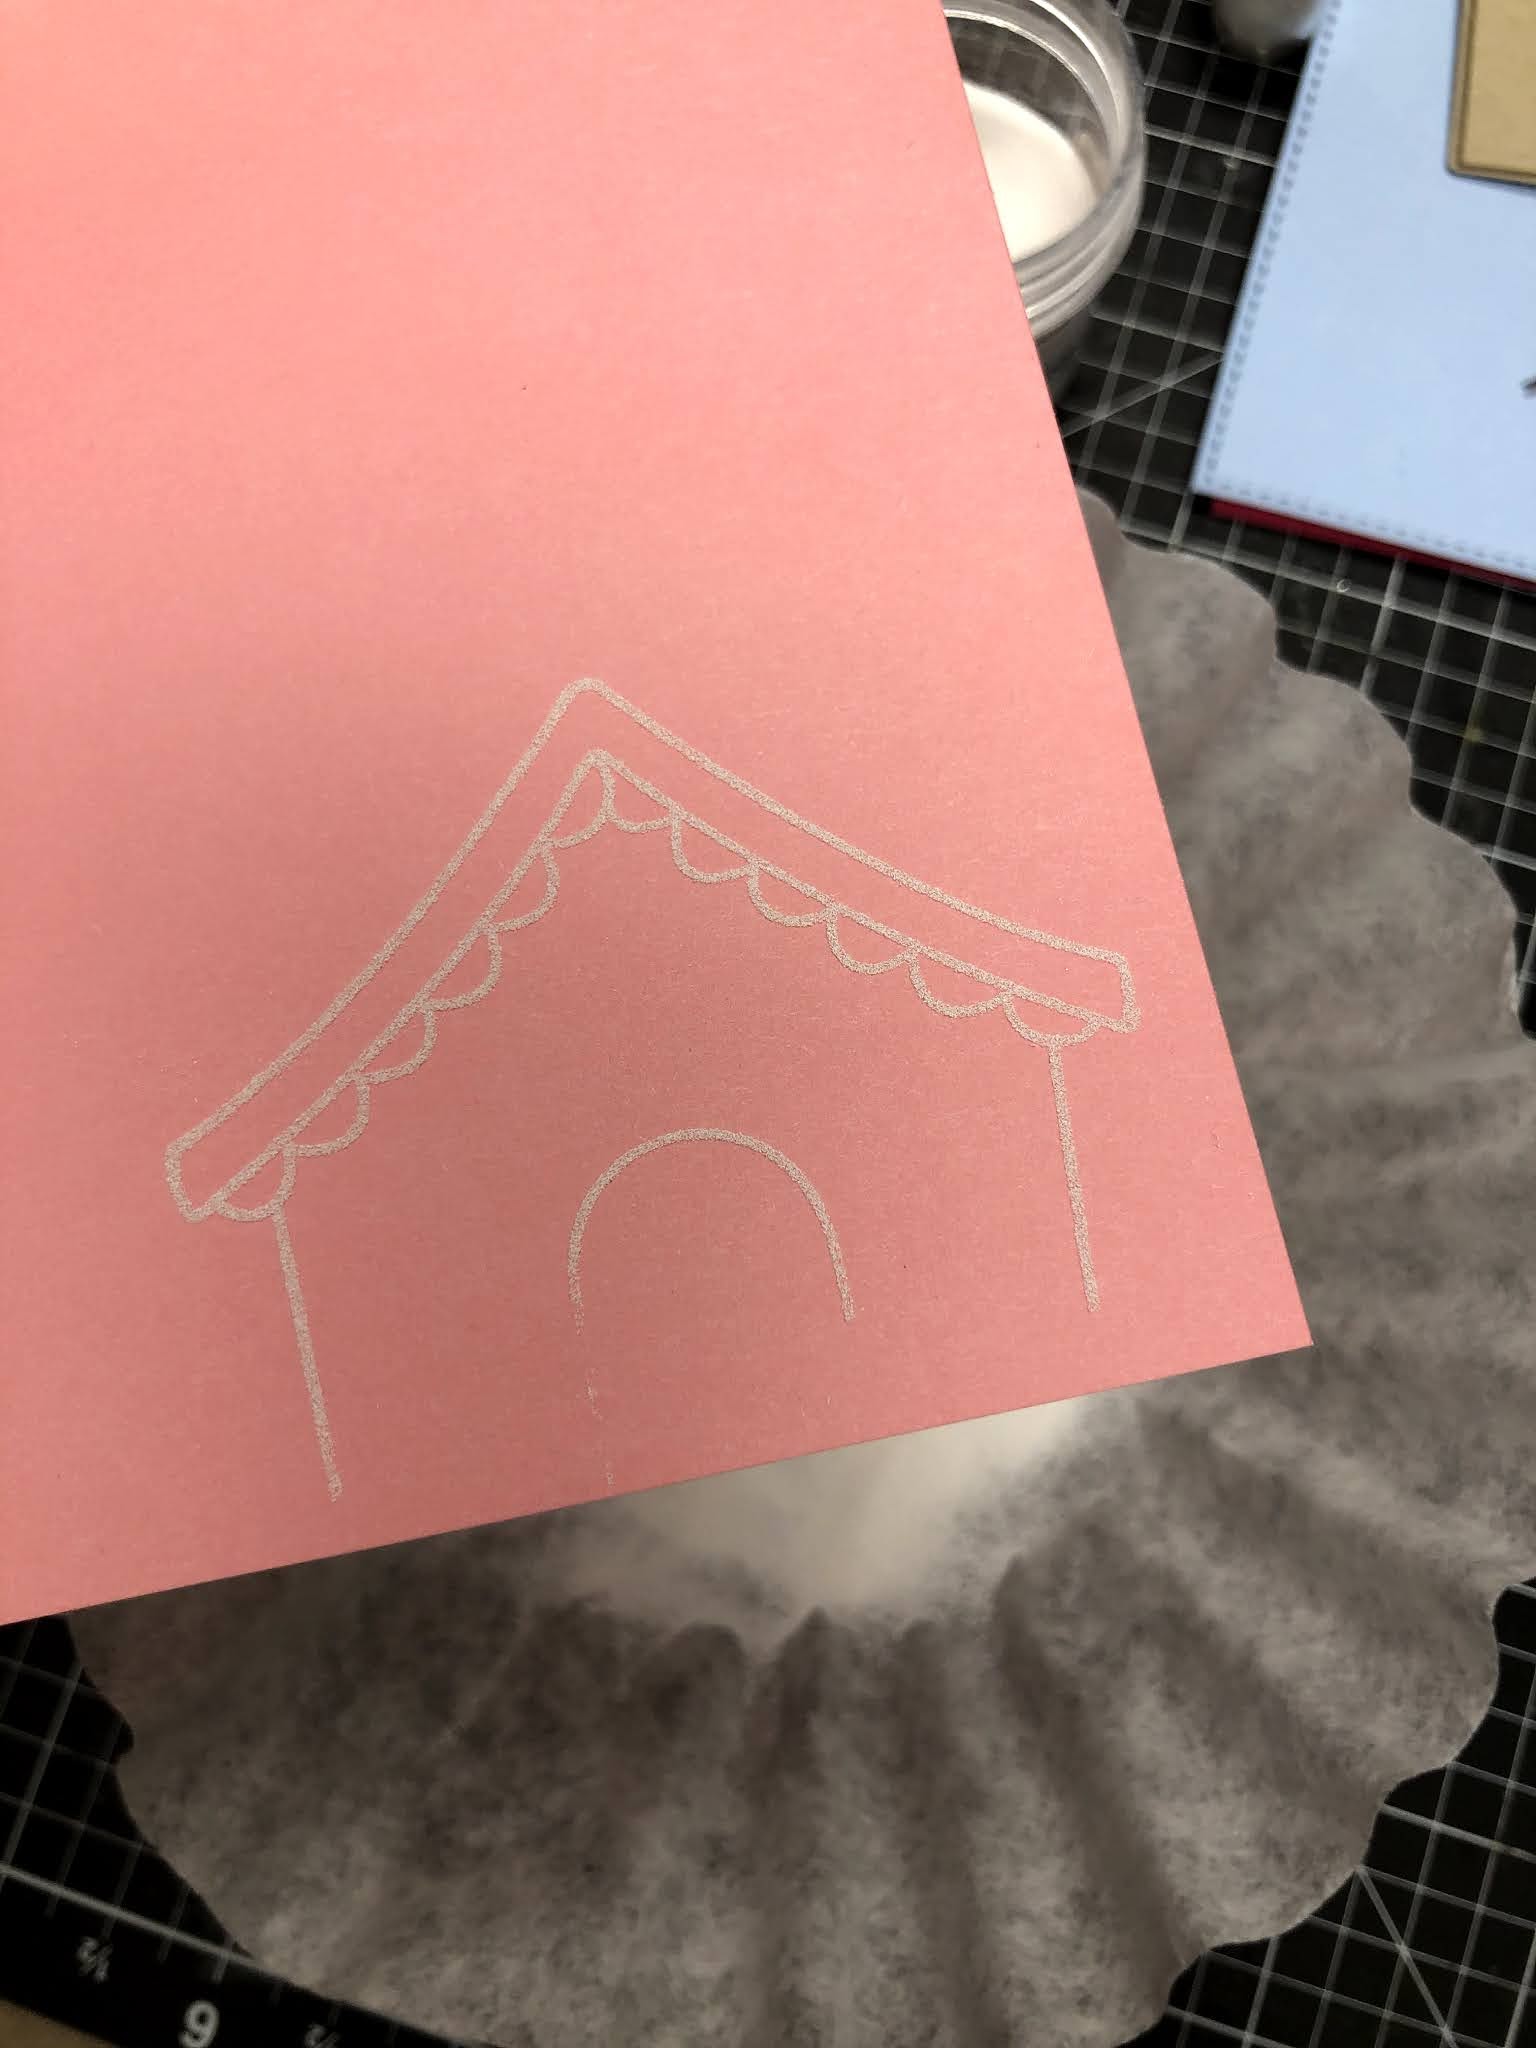
To make the roof for the front Gingerbread House I stamped the Gingerbread House from Sweet Christmas using a Versa Mark Watermark Stamp Pad and sprinkled white embossing powder on it, on pink card stock. Then I used a heat gun to melt the powder.
It wasn't necessary to stamp the whole house since I only needed the roof.
I cut out the piece with the die cut but I only needed the roof so I fussy cut the bottom of the roof. The whole thing could have been fussy cut but by using the die cut I was ensured the top would match the house underneath perfectly.
Let's put the house together. You can glue the roofs on the houses. Glue the lights onto the roofs. Put the window trim around the window. I like to cut the panes out of the window so you can see what's inside better.
The door: you could glue the door right on the house. The door doesn't need to open. But I like the door to open. I think it would be really cute to put an elf behind the door. But I'll save that for another project. If you want a warm glow to shine through the opening we need to put a yellow piece of card stock behind the door. There isn't a solid die to put behind this door so I traced the door onto yellow card stock and cut it out and glued it to the back of the door. Make sure not to glue the door to the back ground if you want to be able to open it up.
Add foam adhesive to the back of the Gingerbread House.
When you peel off the adhesive backing and stick the Gingerbread House to the back house, you don't want to line up the bottoms. That would cover up the upper window where your window reveals things. I line up the center peak of the Gingerbread House roof with the center of the awning. Also, the base of the house is wider than the Gingerbread House so you're going to have to trim the sides a bit. I usually just eye it and cut. About an 1/8" from the bottom edge up to the corner under the roof. I drew some lines to demonstrate.
This is what the houses will look like from the back.
And the front.
My yellow wheel was cut from double sided paper so make sure that the small circle is behind the reveal wheel with the desired color facing up. Use a brad from the back to attach the small circle to the large reveal wheel. A tip I learned is to lay down the pieces with the prongs facing up. Put the prongs of tweezers on either side of the brad prongs and open the brad up.
By putting the tweezers under the brad prongs you make a gap and the reveal wheel turns more freely.
We'll be opening this up later to put a template in place. But we can repeat this step again later.
We're going to attach the front and back panels together but we must first add our images and place the reveal wheel. To line it up perfectly you can use Reveal Wheel Templates: Build-A-House to position your images onto the reveal wheel and line up the wheel with the window. Also you can line up the score line shown in the picture above with the edge of the cut out semi circle in the card front.

The back of the wheel has the small circle. Place small amounts of foam tape around the brad, but not touching the brad or going off the edge of the small circle.
Holding the wheel with (or without) the template behind the front card panel, line up the windows. Carefully turn the card over and remove the backing from the adhesive tape. Turn the card back over and double check the alignment. Match the front and back card panels and press them together. This will adhere the reveal wheel to the back panel. If you used the template and attached it with the brad, you can now remove the template and fold open the brad as shown earlier with the tweezers. Then adhere more foam tape all around the back panel but be sure not to get foam tape on the wheel.
Remove the backing paper from the adhesive and line up the front panel to the back panel and press down. Check out the wheel to make sure it turns freely. Don't you just love seeing the different images appearing through the window?
You're ready to adhere this to the front of the card panel. I'll share a mistake I made. I put double sided adhesive on the card panel because it seemed easier than putting it on the back of the house panel with all of that foam tape. But I forgot about the hole where you turn the wheel. So my wheel got taped down. I removed the front panel and removed the tape from that area and all was well. Whew! It might be easier to use glue to adhere the front panel to the card base but I find glue can warp. So I'll leave that to you. Just don't glue down your wheel.
I cut an arrow with the Reveal Wheel die set from blue card stock and glued that to the card base next to the notch where the wheel turns. This lets the recipient know they're supposed to do something.
Adhere the white panel inside the card. This really does make the card feel more sturdy and gives a crisp white space to stamp or write an additional message.
Finishing Touches: With my white gel pen I added catch lights to all of the lights on the house as well as the candy canes. Then I glued the candy canes to the front of the house. I also used my white gel pen to make snow in the back ground. You could splatter white paint on the blue background before you assemble the parts but I was keeping the supplies to a minimum.
The very last thing I do is make a door knob on the house with brown Nuvo Crystal Drops (not shown in the picture) and take some Glossy Accents and put a dab of glue on each of the Christmas lights. This makes them look very dimensional and they really shine.
Supplies
Lawn Fawn Reveal Wheel
Lawn Fawn Build-A-House
Lawn Fawn Build-A-House Christmas Add-On
Lawn Fawn Reveal Wheel Build-A-House Add-On
Lawn Fawn Reveal Wheel Templates Build-A-House
Lawn Fawn Sweet Christmas stamps and Lawn Cuts
White Card Stock 4" X 5 1/4", Scrap 2 1/2" X 4 1/2", and Scraps
Blue Card Stock 10" X 5 1/2"
Brown or Craft Card Stock
Brown Ink Pad
Blue Ink Pad
Yellow Card Stock 3" X 3"
Pink Card Stock
Brown Nuvo Crystal Drops
Red Ink Pad
White Gel Pen
Dimensional Foam Tape
Crystal Effects Glue - or other glossy glue
Wet Glue - mat finish
assorted colored markers
Masking paper or post it tape
Versa Mark - Watermark Stamp Pad
White Embossing Powder
Memento Tuxedo Black Ink
Heat Gun
Scissors
Manual Die Cutting system
Acrylic Blocks or Stamp Platform
Paper Trimmer