Haunted Reveal Wheel House
The most time consuming part of this card is cutting out the pieces. I've pre-cut the pieces and snapped a photo so you can see what pieces I cut. This project is good for using up some scraps.
I'm using purple card stock for the card base. Cut one piece 5 1/2" X 8 1/2" and score it down the middle, horizontally for the card base. I stamped the message "Turn Here to Spook" from the Tiny Halloween set once I had cut the orange background piece. I centered the orange piece over the card front and placed the turn sentiment where it would show up. This can be done later but the reveal panels will be raised with foam tape and can make it more difficult to stamp later. Just remember when stamping this, that there will be a wheel sticking up past the cut out so you don't want to stamp your sentiment too close inside the cut out semi circle.
I cut a white panel, 4" X 5 1/4" to tape inside the card. This gives a white area to write or stamp a message inside the card as well as adding a little weight to the right side of the card when opened. All of the decorations and panels on the front add weight to the left side of the card when opened. Adding an additional panel balances the feel of the card.
While cutting out all of my black pieces, two of my dies overlapped and it cut a notch out of the bottom of the door. To avoid this problem, secure dies to the paper using a small piece of low tack tape. Since this is a spooky house I thought the irregularity just added to the theme. As it turns out, I forgot to glue on the bottom house trim and covered up the bottom of the door anyway.
I wanted to give the impression of light glowing behind the windows. There isn't a solid die for the window and door so I traced the window and door and cut on the inside of my drawn lines. I stamped the spider inside the door. Then I glued the solid yellow pieces behind the door and window.
I cut a square of white card stock 4" X 4" to cut the wheels from. I stamped and cut out 4 images from Tiny Halloween from the scrap of white that was left after cutting out the wheels. I am going to use the black and yellow wheels to cover the white wheel. This will make it look like a light is going on and off in the upstairs window. I will be gluing the ghost, eyes and bats in the yellow and black areas of the wheel. You could use the white wheel as it is. By placing the Reveal Wheel Templates for Build-A-House over the white wheel you can know exactly where to stamp directly onto the reveal wheel. I will demonstrate this in another card. You can also place the template over the wheel to know where to glue your die cuts.
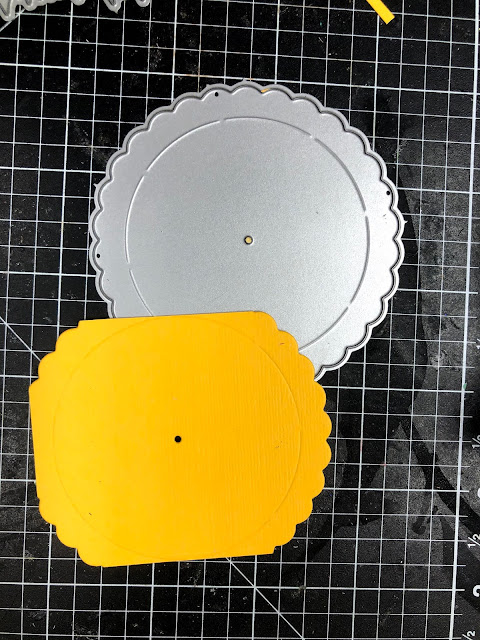
In this photo you can see that I used a scrap of paper to cut out my yellow wheel. I am going to be cutting this wheel into quarters and then cutting on the impressed circle. My scrap was large enough for what I needed.
Before assembling the card, decorate the front panel. Here's a tip: glue the moon, grass and fence before putting the house down. Also, it is best to stamp a message on the grass before assembling because there will be foam tape under the grass. Before adhering the window frame, cut the pane to make it look broken. This will also allow you to see the images better. If you want to see what's behind the door, make sure you don't glue the door closed.
There are two ways to proceed. You can put the Build-A-House Template over the wheel to line it up perfectly in your window or you can line up the score line on the wheel with the edge of the semi circle cut out.
Also note to cut the window in the top panel, place the window die in the frame like a puzzle piece. Hold it in place with low tack tape and cut it out.
Remove the backing from the foam tape on the small circle. Line up the front and back orange panel and press the wheel onto the back panel.
Then adhere foam tape all around the wheel on the back panel but make sure not to bind up the wheel with tape.
Remove the backing from the foam tape and align the front panel to the back panel. Add tape or glue to the back of the back panel and affix it to the card base.
Finishing touches: I used Nuvo Crystal Drops to add a door knob and I added eyes to the bat with a white gel pen. This is a basic card. You can make it more dramatic by blending inks to the edges of the grass, the house and the background.
Dies and Supplies
Lawn Fawn Build-A-House Halloween Add On
Lawn Fawn Spooky Fence Border
Lawn Fawn Reveal Wheel
Lawn Fawn Build-A-House
Lawn Fawn Reveal Wheel Build-A-House Add On
Tiny Halloween Stamp Set and Lawn Cuts
Mushroom Border (or any grassy border)
White Card Stock 4" X 5 1/4" and 4" X 4"
Brown Scrap
Yellow Card Stock 5" X 3"
Green Card Stock 2 1/2" X 4 1/4"
Orange Card Stock 5 1/2" X 8 1/2"
Purple Card Stock 5 1/2" X 8 1/2" and 3" X 4"
Black Card Stock 3" X 6" and 3 1/4" X 3 1/4"
1 3/4" Circle Punch or die
Foam Tape
Black Ink
Scissors
White Gel Pen
Brad
Glue
Quickstik Took
Dark Walnut Crystal Drops Gloss
Acrylic Block
Bone Folder
Washi Tape
Die Cutting Machine


